We decided to remind tankers of Himmelsdorf's features and suggest the best strategies in this guide prepared by Wizard, our community manager.
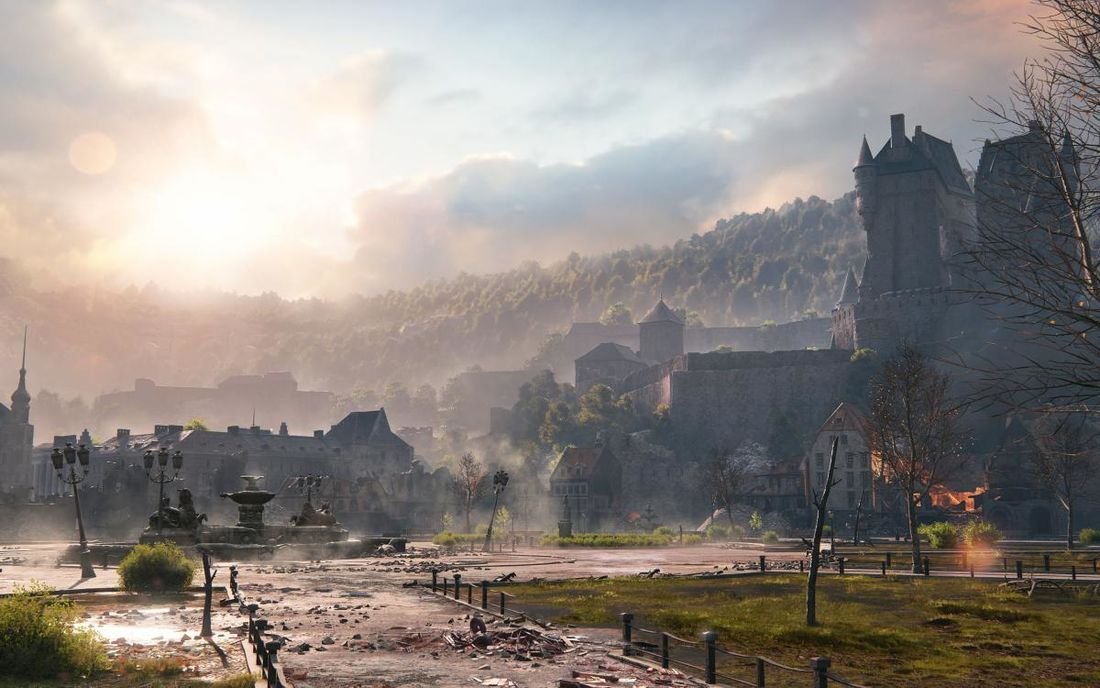
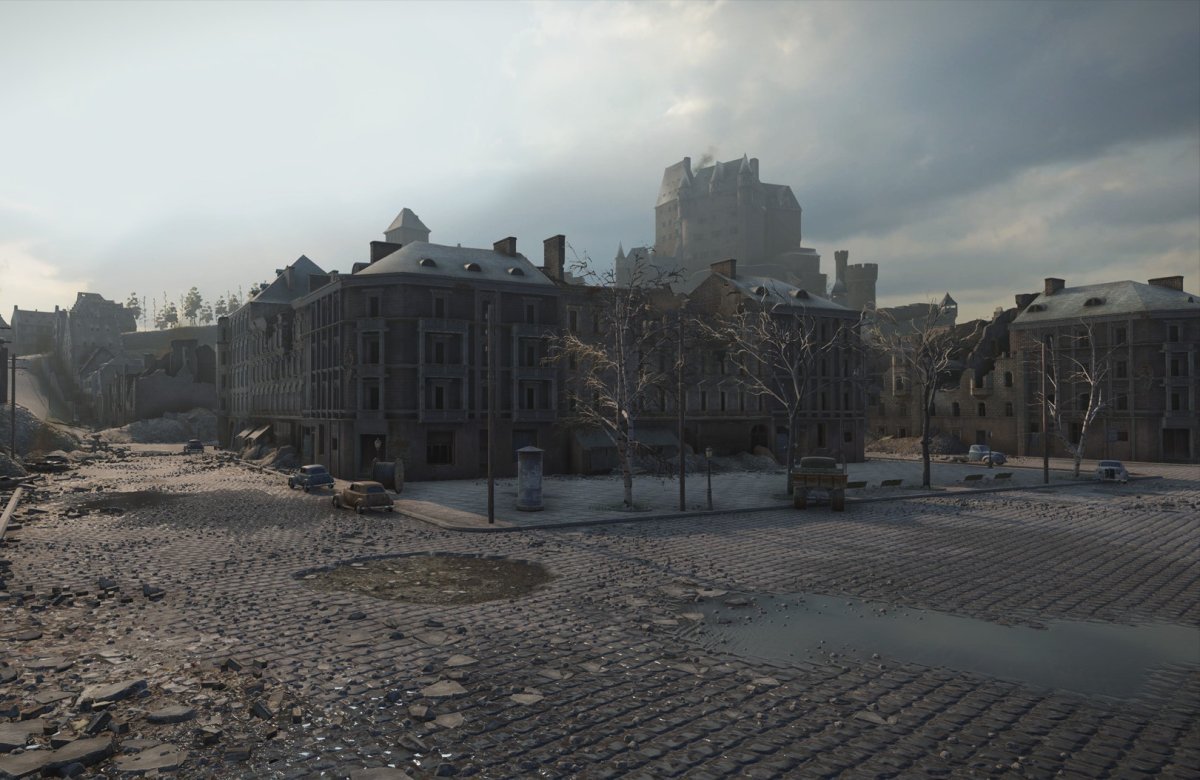
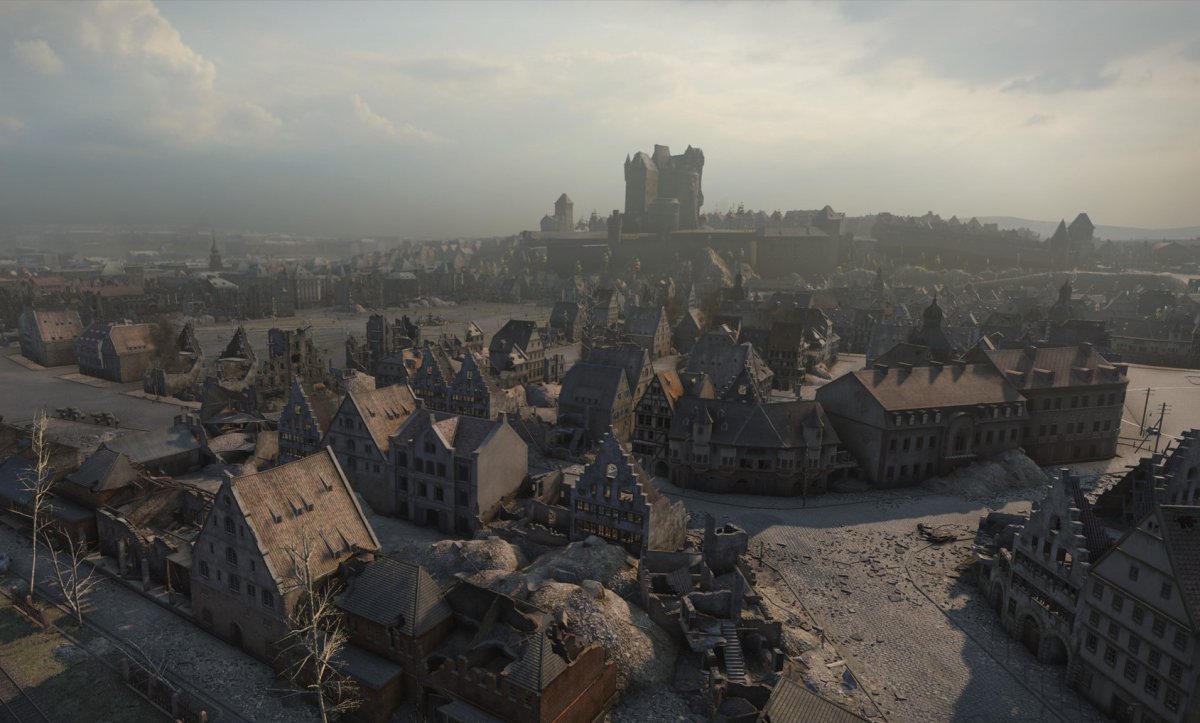
Himmelsdorf was one of the first maps in the game and is one that has withstood the test of time.
The map is a labyrinth of streets and squares, impossible for artillery but ideal for clashes between heavies, not to mention speedy breakthroughs with light and medium tanks. There’s even a joke for it: Bad artillery commanders will go straight to Himmelsdorf when they die.
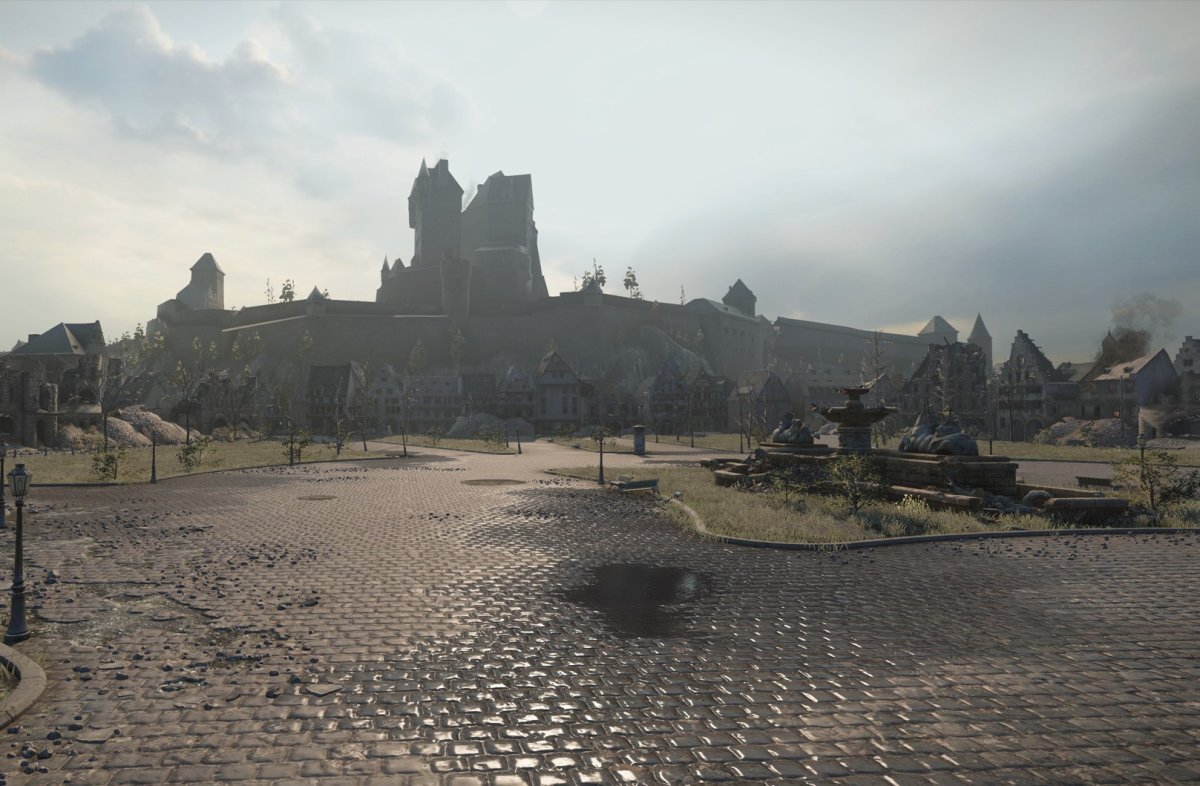
Bypass roads, which run beside the hill with a castle that dominates the area, can help you out of your impasses, as can the railway lines.
Below you’ll find some gameplay tips for each vehicle class on the Himmelsdorf map.
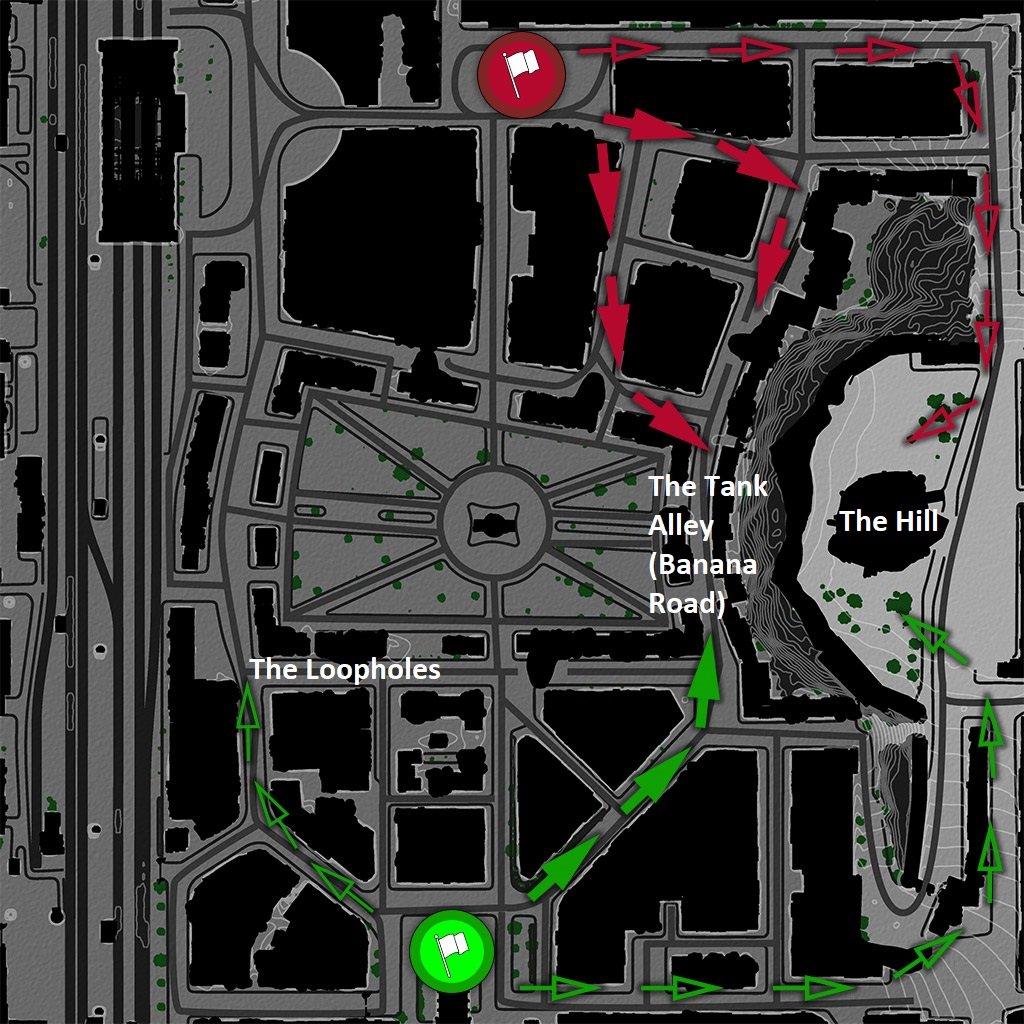
Note: The dark arrows in the maps below indicate the priority directions, while the light arrows mark the non-priority ones.
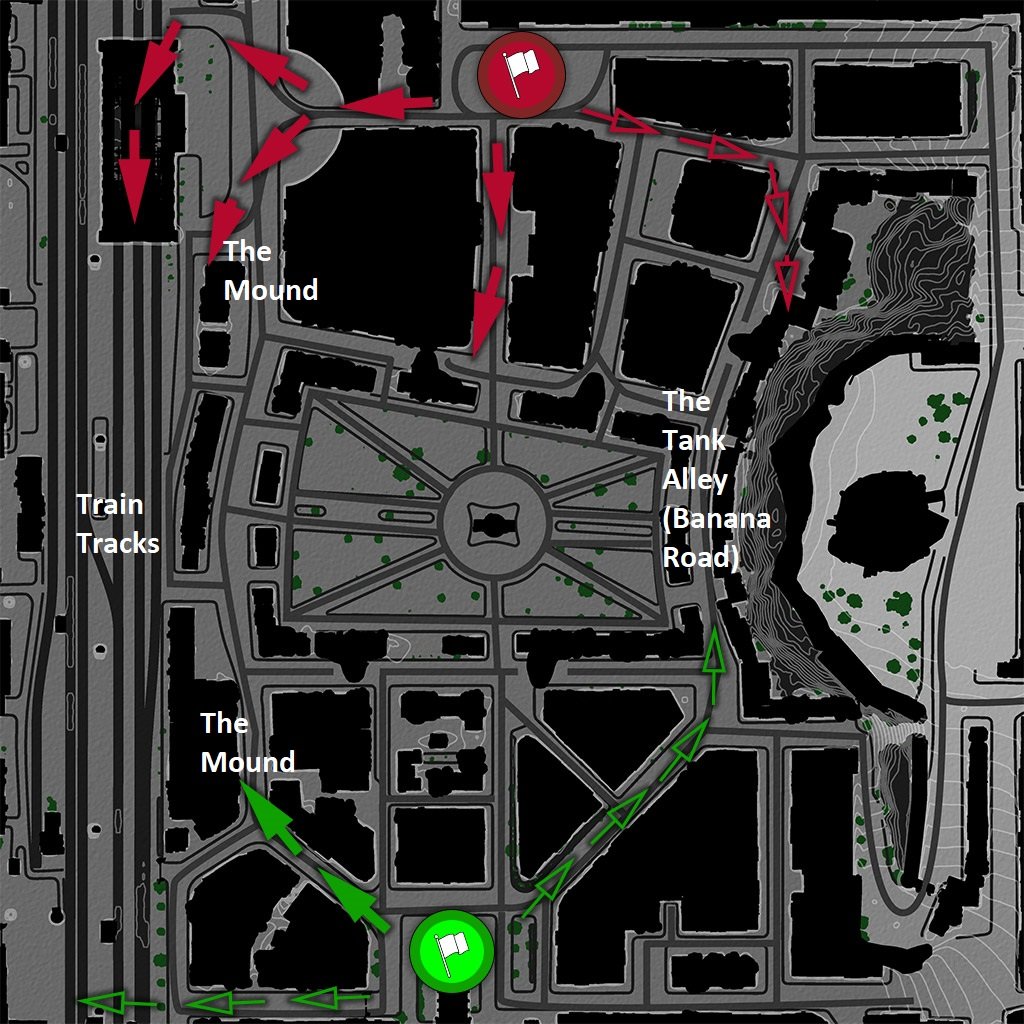
Heavy Tanks
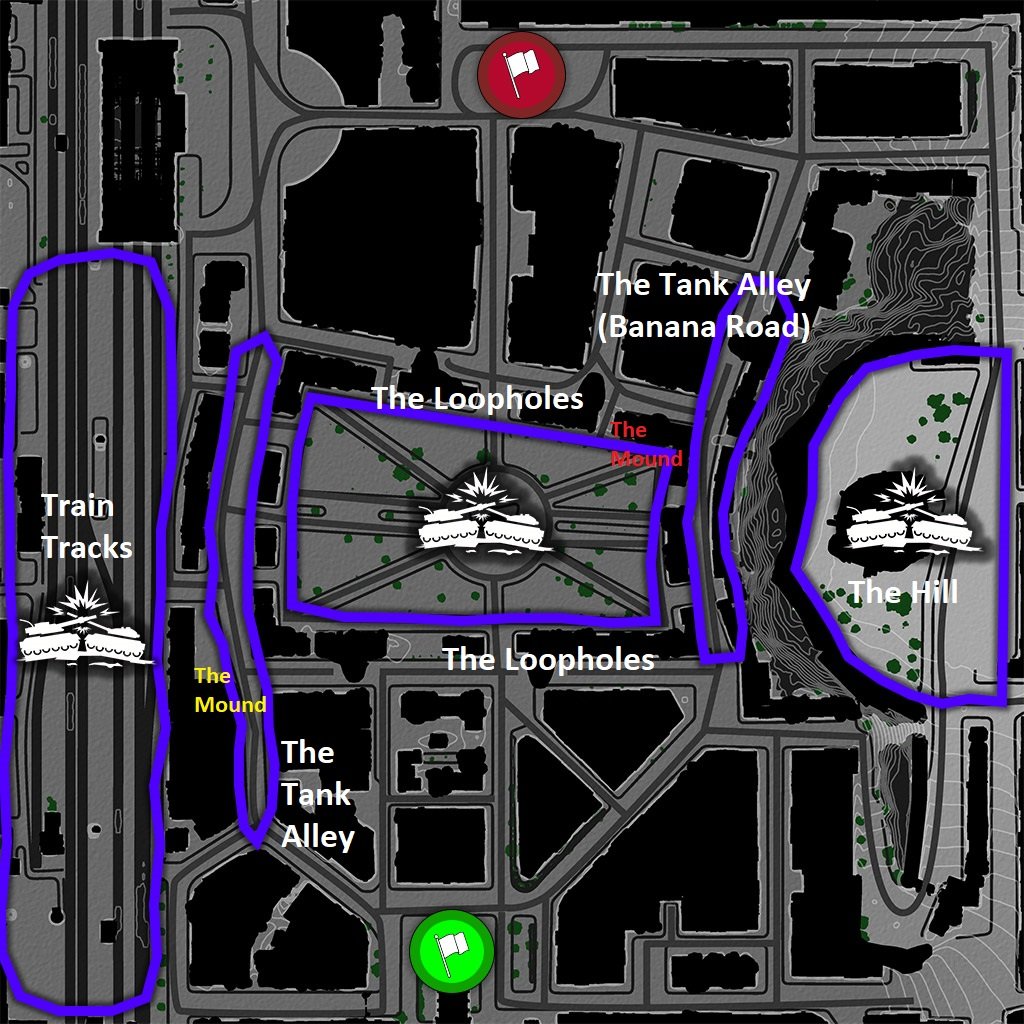
There are three paths for heavy tanks. Here they are listed from most to least common.
The Tank Alley (Banana Road)
This is a narrow path along the hill on the right. It’s the part of the map where the fiercest battles are fought. It’s also where heavy tanks can make the most difference. Breaking through this area usually decides the outcome of a battle. So heavy tanks bear a huge responsibility on this map!
The Hill
This route is suitable only for mobile heavy tanks with good depression/elevation values and a powerful engine. If your vehicle noticeably loses speed when climbing, this direction isn’t the best choice.
The Loopholes
This is a pretty uncommon location that allows you to use sidescraping techniques against enemy vehicles hiding in the loopholes along the road. It also blocks the opponent’s way from the railroad tracks.
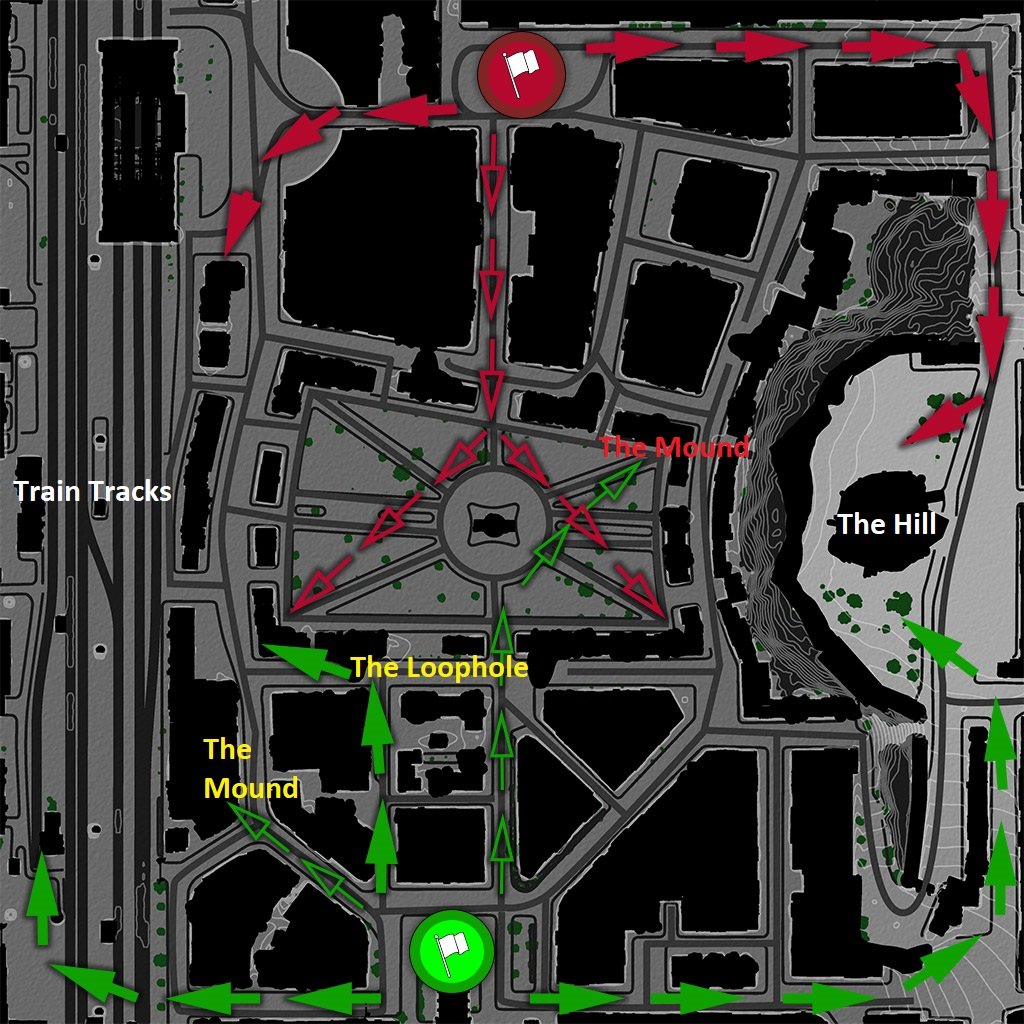
Medium Tanks
Medium tanks have four main paths:
The Hill
This is one of the most important routes in the game! Whoever wins the battle for the hill heads off to the enemy base to take out SPGs and also gets access to the heavy tanks’ rear. This direction is best suited for medium tanks with good depression/elevation values and solid turret armor. After capturing the hill, you’ll be able to not only break through toward the base but also unleash fire at enemy tanks both on the railway and in the center of the map.
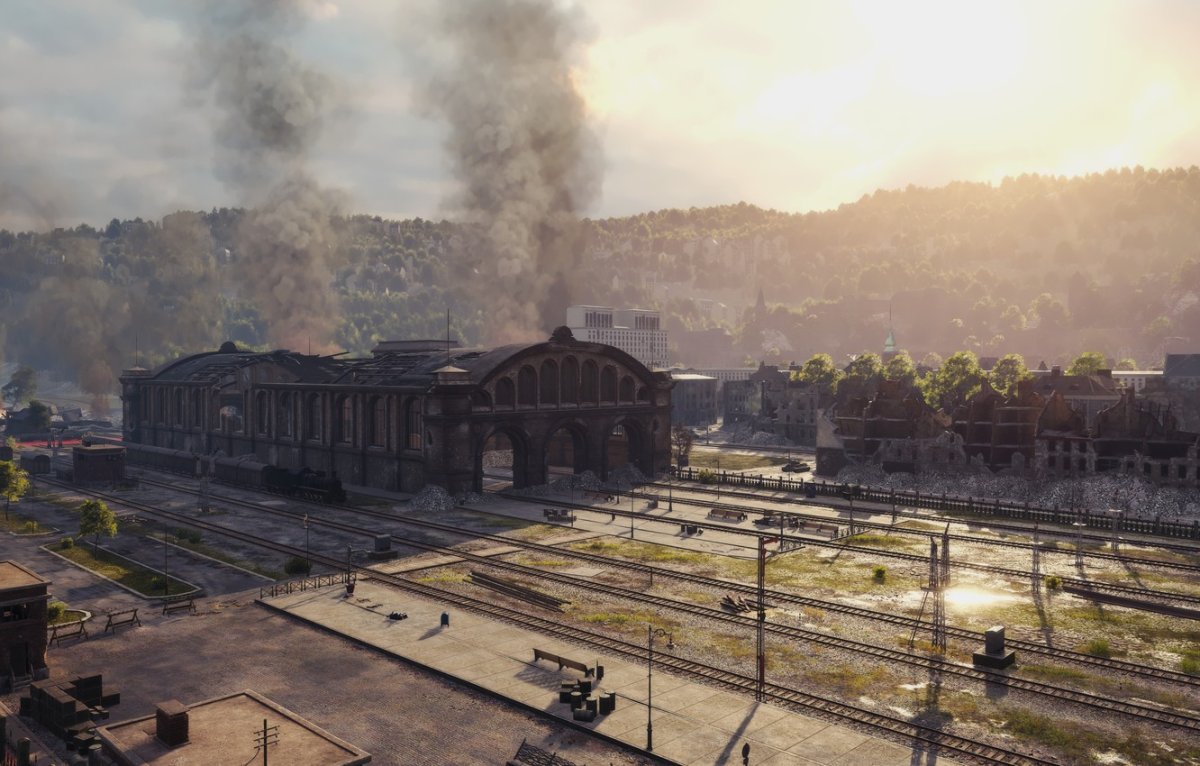
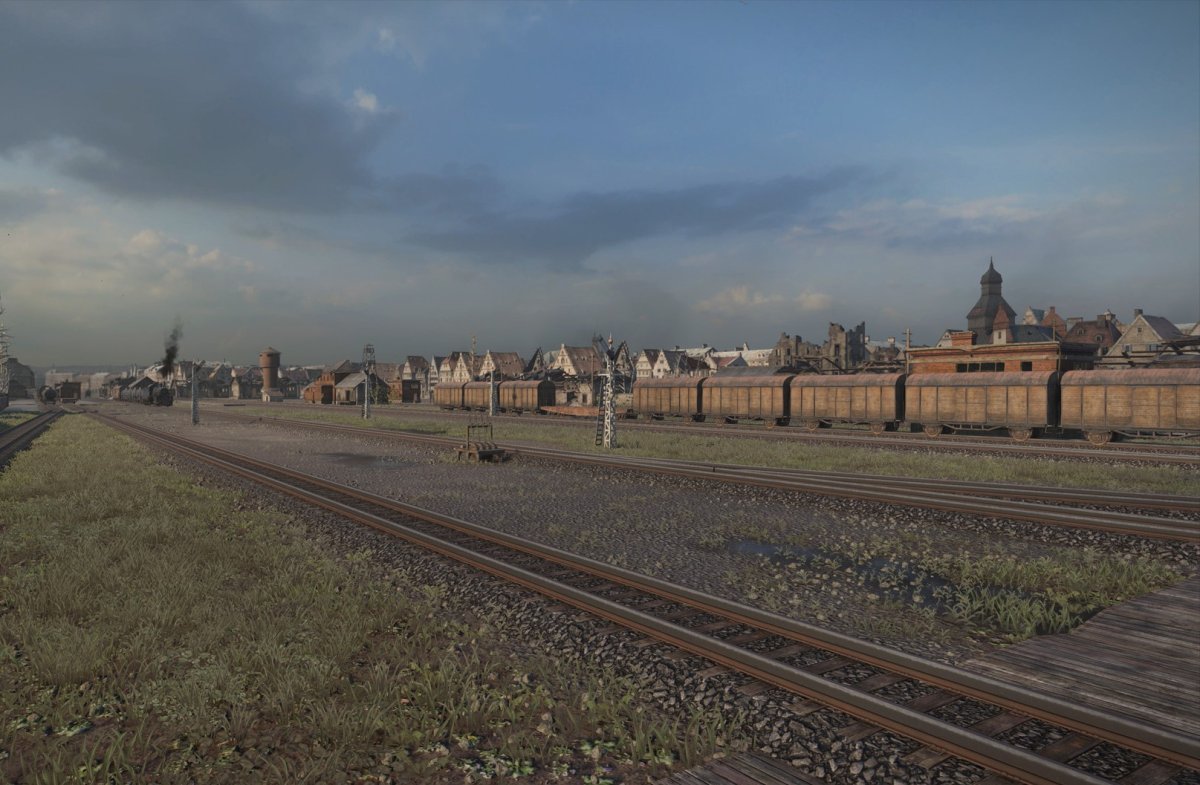
Train Tracks
This is another important area that will allow you to break through toward the enemy base bypassing the hill. There are many buildings close to the railway that you can hide behind while carefully sneaking up on unsuspecting opponents. If medium tanks get to the railway station, it’ll be easier for the team to act. The enemy will notice that their defenses have been breached and start retreating to the base. This will give your allied tank destroyers their chance to safely take their positions and land shots at their targets in the tank alley and on the hill.
The Mounds
These spots are suitable for medium tanks with a very strong turret. From here, you can shoot your way through to the enemy positions.
These positions are the most dangerous, as you need to drive through an open area in the center of the map. Once your vehicle gets there, it’ll be able to spot not only the enemy heavy tanks at the tank alley but also all vehicles along the loopholes’ perimeter.
The Loophole
It’s a pretty rare position that allows you to use sidescraping techniques against enemy vehicles hiding in the loopholes along the road. It also blocks the opponent’s way from the railroad tracks.
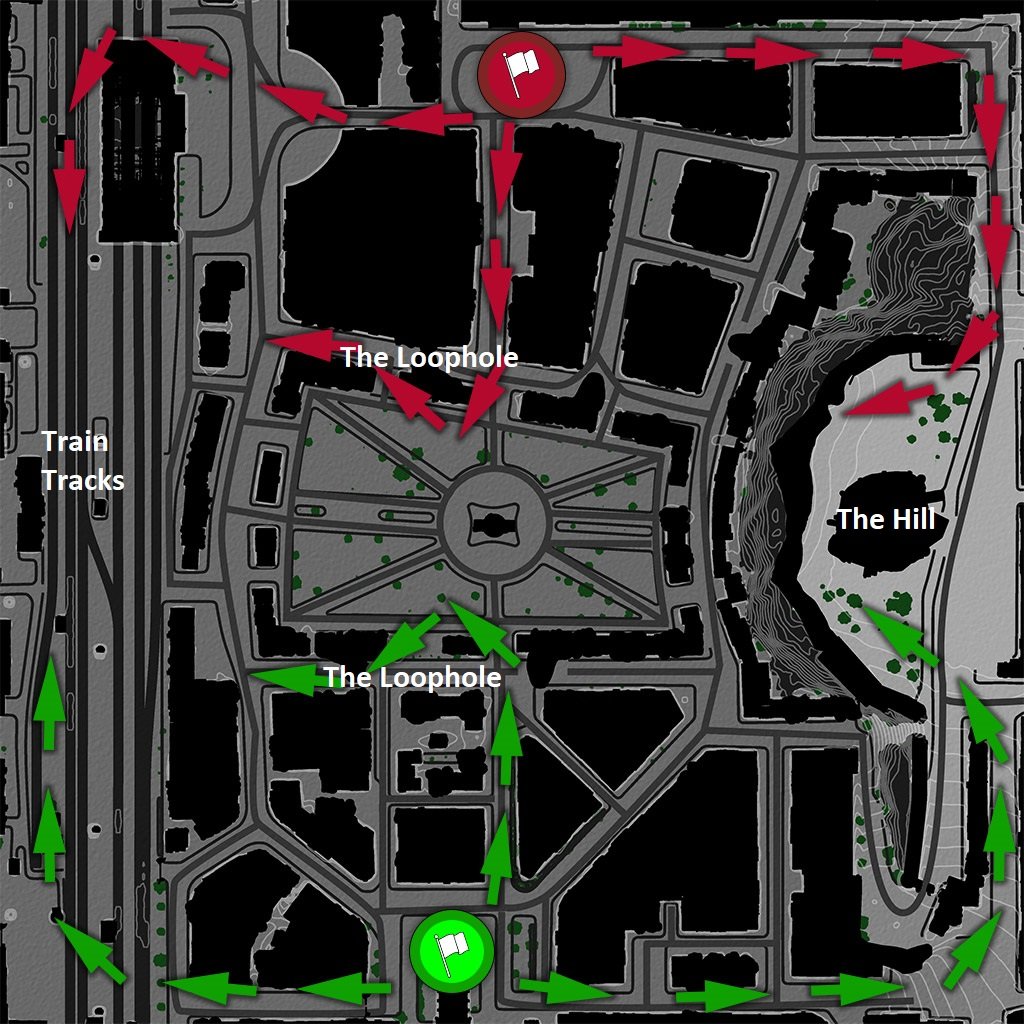
Light Tanks
Train Tracks
The railroad tracks are the most important path for light tanks. The main task here is to prevent enemy vehicles from breaking through your flanks to the base.
This is the longest line of fire on the Himmelsdorf map. Passive spotting is not an option here, so light tanks need to be very cautious. The best tactic is to drive out from behind a building, spot an enemy tank, and quickly take cover.
The difficulty of this route depends on both the opposing team and your allies. If there are many allies and few enemy tanks, you can try to launch a flanking attack. At the top of the map, there is a large building on the left side. Getting to it can give you a tactical advantage. Here, light tanks only need to do the spotting, as shootouts may result in their destruction.
The Loophole
This route is similar to the previous one, except the tank has to drive through the central street first. The map is small, so you can spot enemies right away and show your allies the directions in which the enemies are moving. This will positively affect your team’s future actions!
Once all the spotting in the center is done, turn to the sides. After that, you can proceed at your own discretion. You can stay at the corner of the buildings and spot enemy vehicles in the railway and loophole areas, or you can also drive to the railroad tracks and help your allied light tanks. If there are no light tanks around, find a building to hide in and to do a bit of spotting for your allied tank destroyers.
The Hill
This direction is generally more suitable for medium tanks. But thanks to their good mobility, light tanks can quickly drive up the hill and spot an approaching enemy. From the high ground, you can also effectively attack targets at the railway. If there are enough allies on the hill, it’s better to leave this area to medium tanks.
Tank Destroyers
The Mounds
These are the best positions for tank destroyers on this map. Strong frontal armor and the mound can protect them from almost all enemy shells. The only thing to watch out for is sharpshooting artillery.
Train Tracks
This position is suitable only for tank destroyers with excellent concealment and good mobility.
All vehicle routes are well covered from here, but only if you have an allied light tank that will do the spotting for you. In case you are spotted, you need to leave this area immediately since there’s no protection, and enemy tank destroyers or SPGs can send you back to the garage with a few shots.
For the upper base, however, the situation is completely different. There’s a station building that provides excellent protection for tank destroyers and allows them to avoid being spotted. In the case of a breakthrough, however, it will be almost impossible to leave this spot. Use it at your own risk!
The Tank Alley (Banana Road)
This area is suitable only for well-armored turreted tank destroyers. If a tank destroyer doesn’t have a turret, a damaged track will result in complete disarmament, and you’ll most likely end up being a burden to your team. So, if you’re playing with a turretless tank destroyer, choose the second direction.
Artillery (SPG)
As mentioned at the beginning of the article, artillery just can’t help but suffer on the Himmelsdorf map, so there’s no particular tactical advice here.
For SPGs, there are only two spots for each respawn point: the far left and the far right. At the same time, you should understand that there’s nowhere to hide, getting spotted almost always equals getting destroyed, and you mostly won’t be able to hit targets with so many buildings in your way. Brace yourselves!
See also our previous guides on the following maps: