We decided to remind tankers of Prokhorovka's features and suggest the best strategies for the map in this guide prepared by Wizard, our CIS community manager.
The legendary Prokhorovka map is one of the oldest and most beloved locations in the game. It’s a dream come true for all fans of light tanks and SPGs, and a real handful for those who like heavy tanks. Over the years, the map has changed many times—and with it, so has the players’ behavior in battle, firing positions, and main areas of attack.
World War II: Available to Tier V–X
Size: 1000 x 1000 m
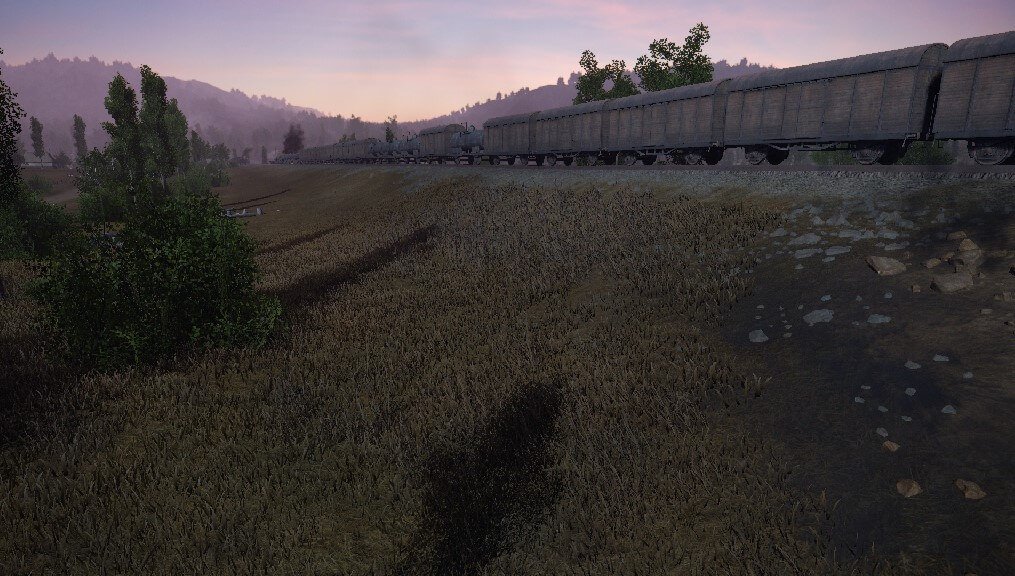
Season: Summer
So, what are the gameplay tips for today’s map, Prokhorovka? Let’s read on and find out!
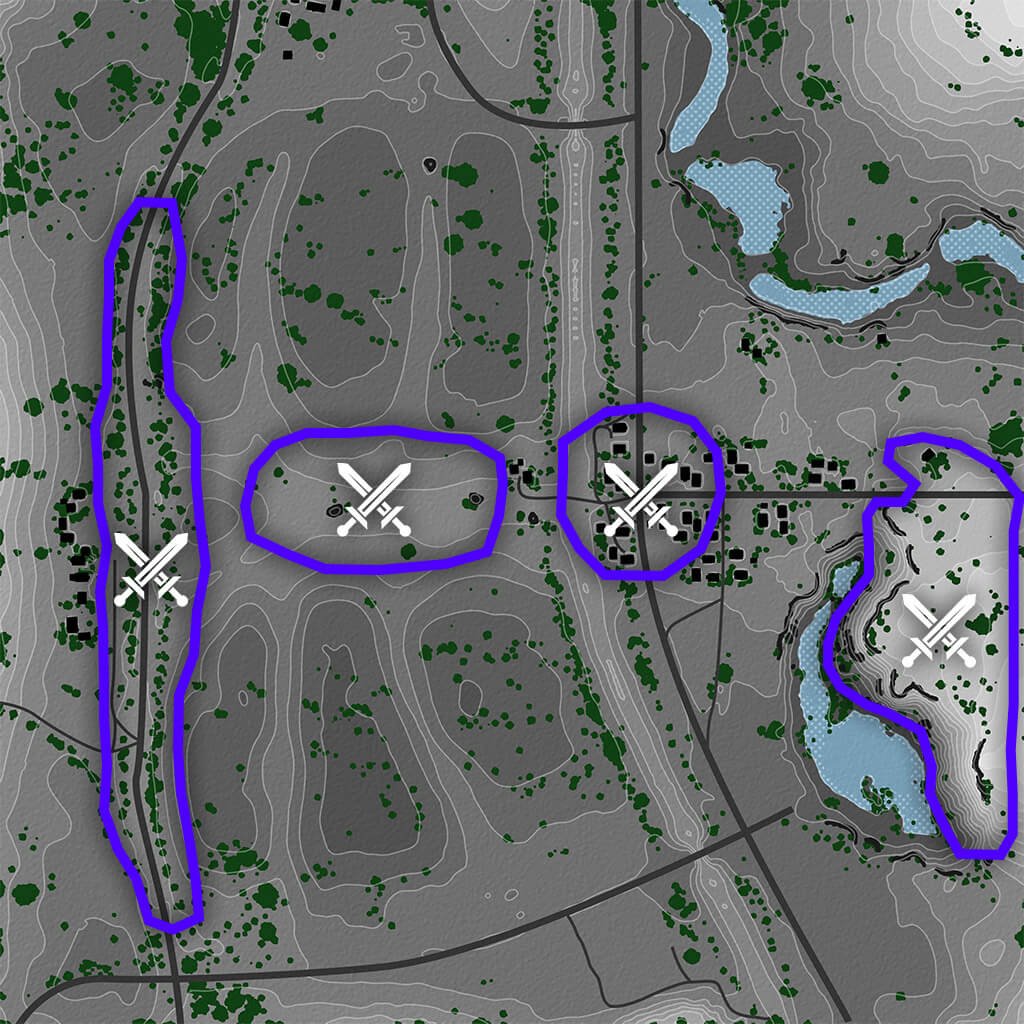
The Alley (“Green” area), where tank destroyers clash and exchange fire
The Mountain, with mostly medium tanks fighting for its control
The Railroad, stretched along the 6th parallel, and known as the heavy tanks’ area
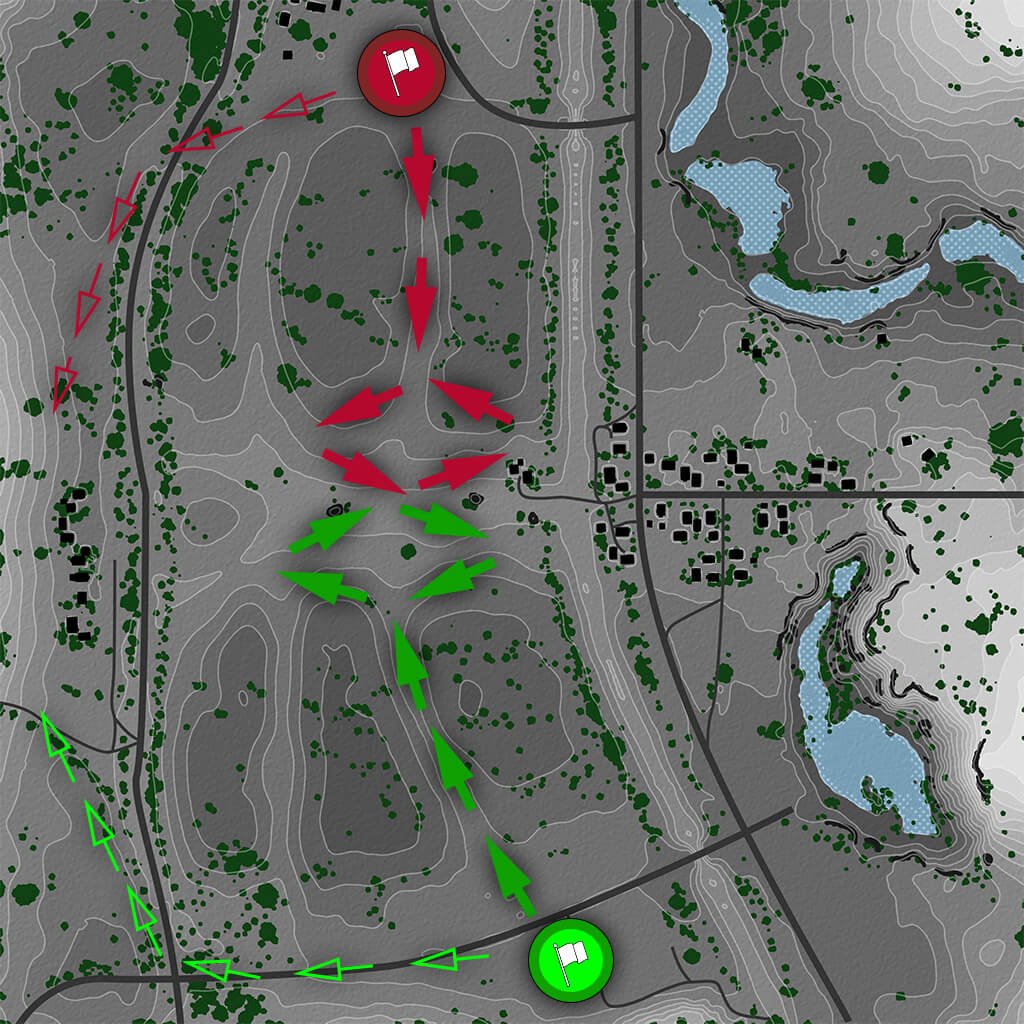
Note: The dark arrows in the maps below indicate the priority directions, while the light arrows mark the non-priority ones.
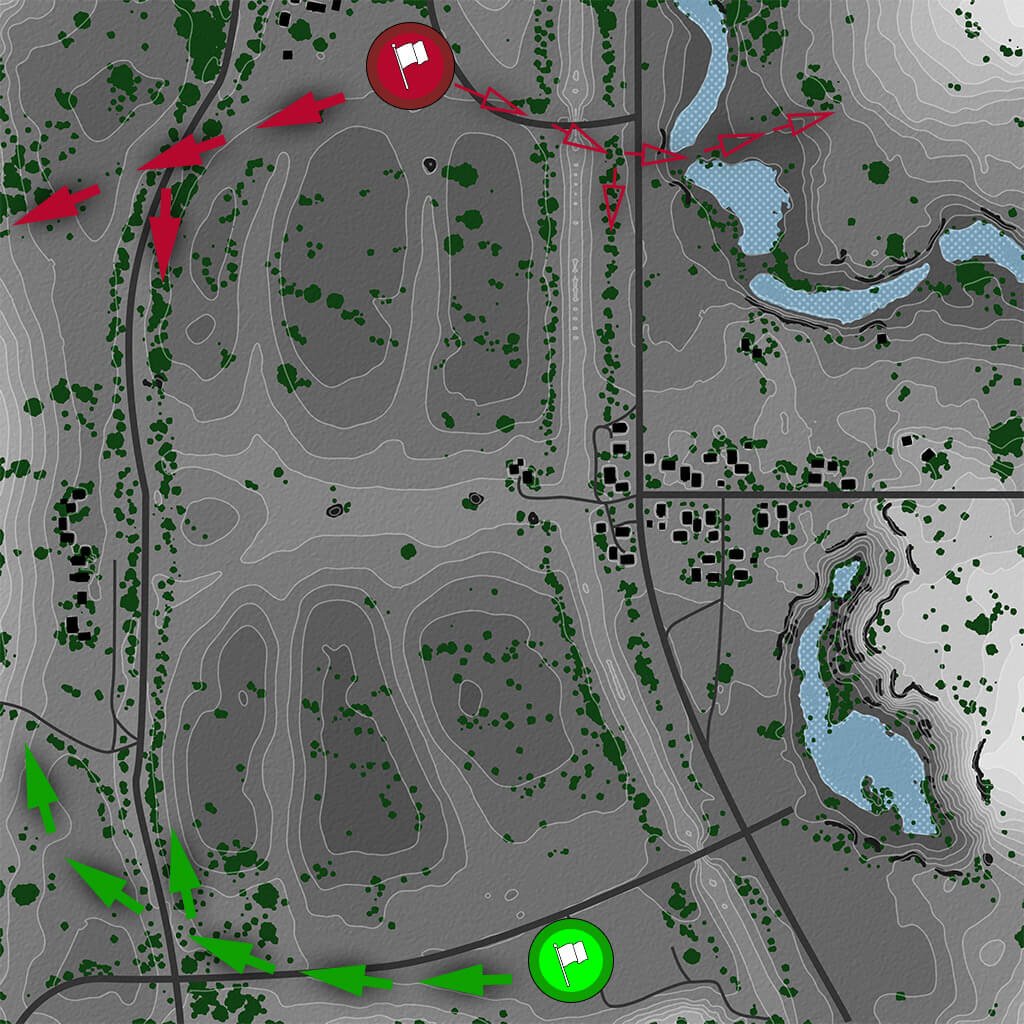
Light Tanks
On the Prokhorovka map, success in battle often depends entirely on the actions of light tanks. The longer allied light tanks survive, and the sooner enemy light tanks are destroyed, the greater the chance of achieving victory.
Light tanks are obviously the kings here. At 15–20 seconds into a battle, a competent light tank commander can spot about 10 vehicles from a hill in the center of the map.
However, it’s crucial to understand that a light tank should, by no means, remain in one place on this map. You should always be on the move, continue to drive up the hill to spot your opponents, and quickly return to your territory on the map. A damaged track equals defeat, so you need to be very cautious and keep your head down.
Light Tank Tips Provided by Our Community Ambassador “Iggy”
[MERGE]
Light TanksDO’s:
If you have the mobility, get to the middle ridge as soon as possible and scout the enemy team’s side. Don’t sit or camp at one place. Drive in the shape of an 8 and use the entire ridge to your favor, taking advantage of the uneven terrain to get out of sight and fire from the enemy team.
Light Tanks DON’Ts:
Don’t go over the ridge and don’t rush in guns blazing. The enemy team has a good line of sight of their area and you will be destroyed. Also, the west hill and the flank are narrow and dangerous areas that are hard to maneuver. It’s a lower-priority area.
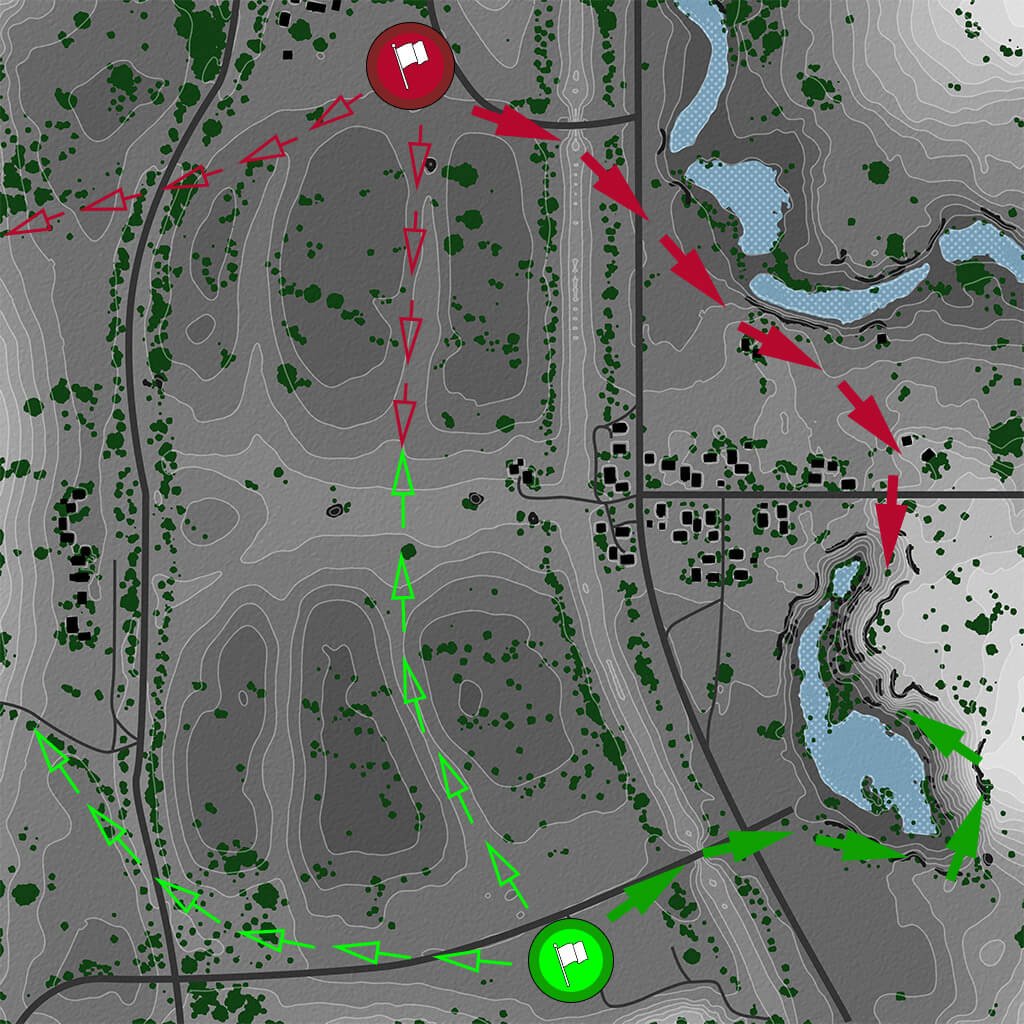
Tank Destroyers
The main task of tank destroyers is to occupy the bushes in the alley and deliver accurate shots at all enemies spotted by a light tank. And most importantly, make every shot count!
Tank Destroyer Tips Provided by Our Community Contributor “I DANTKND I”
The role of a tank destroyer is very simple: provide support to anyone on the front line. However, you must use your concealment very well. You’ll have to observe which side has more enemies before positioning yourself somewhere.
[MERGE]
Tank Destroyer DO’s:
Provide support to anyone on the front line.
Use the vegetation to your advantage.
Prioritize the enemy light tanks.
Tank Destroyer DON’Ts:
Don’t get detected. Stay hidden, preferably using positions in A1 or B1 and J1 or K1.
If you see the majority of the enemies on the other side, don’t camp. Move to a more advantageous position.
Medium Tanks
Medium tanks usually go to the mountain. The team that can push through this location will have access to the enemy’s rear areas.
Medium Tank Tips Provided by Our Community Contributor “Cpl Derren aka WoTC Academy”
[MERGE]
Medium Tank DO’s:
Your job as a medium on this map is to support the two major flanks (lines 1 and 0) and take advantage of late-game openings. To do this, focus on controlling the middle ridgeline between line 1 and the railroad tracks. There you have the best position to shoot/support lines 1 and 0. If you lack gun depression, hang with the heavies on line 1 and support them until an opening appears for you to exploit.
Medium Tank DON’Ts:
Don’t go over the ridge in the early/midgame. Chances are you will not survive even cresting the ridge.
Don’t forget: arties are in the game. Keep moving and reposition after each shot. Drive erratically to prevent artillery from targeting you.
Don’t forget that the cliff in line 0 is a good spot to shoot at you, too. After peeking over the ridge, pull back behind the tracks and/or drive towards line 1 to escape return fire.
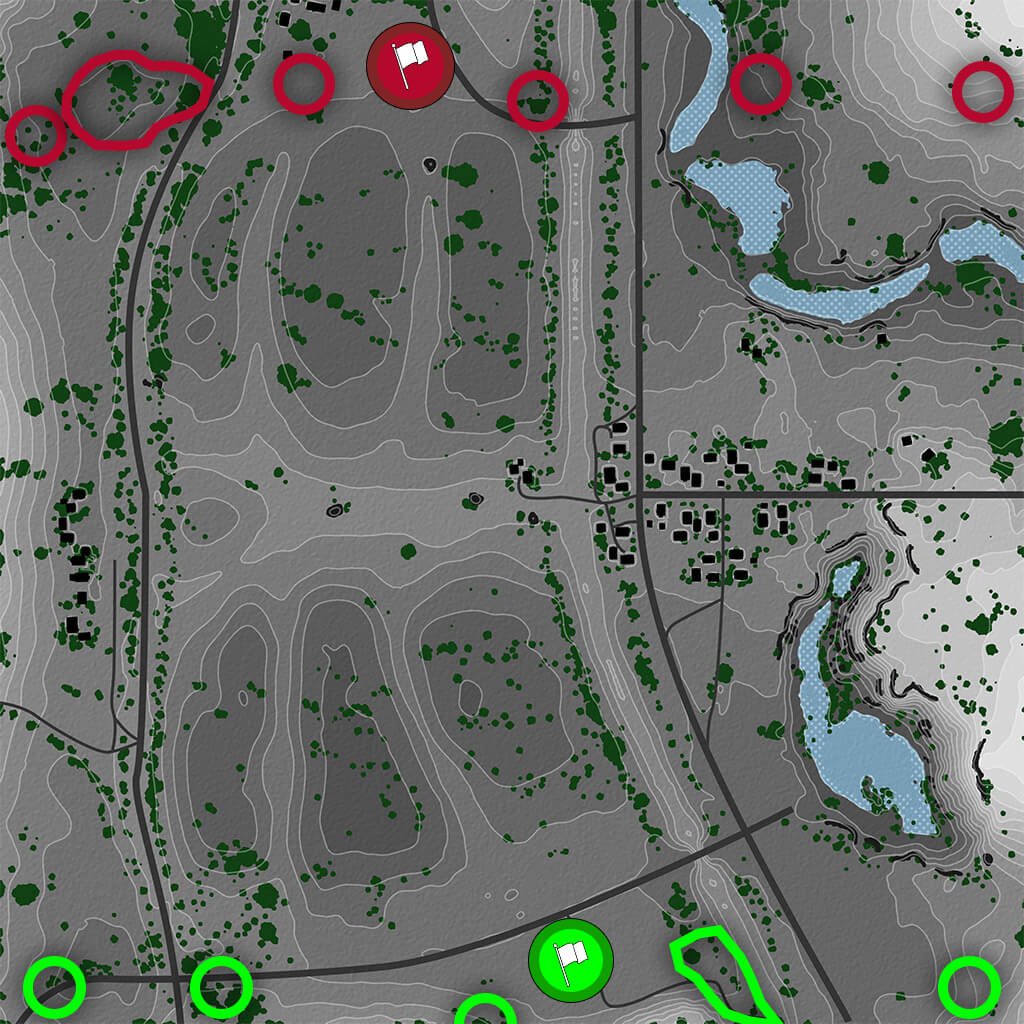
Artillery (SPG)
Artillery works most effectively from the positions marked below and can fire at targets on almost any part of the map. It is extremely difficult to hide from it. Controlling the enemy’s artillery and destroying it in these positions will make life a whole lot easier for you and your allies.
Try to be the first to eliminate the enemy platoons of experienced light tank and artillery players, as they can seriously affect the outcome of a battle.
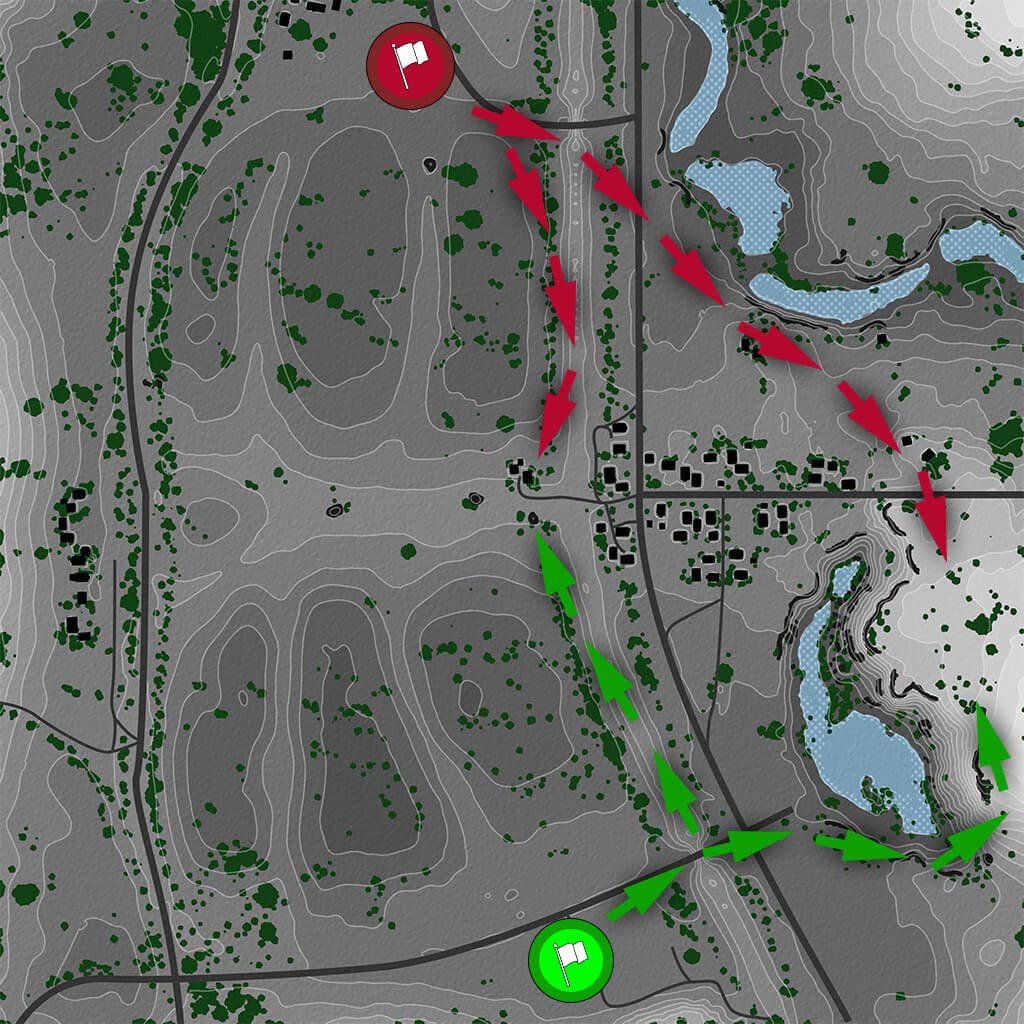
Heavy Tanks
Heavy tanks have it really rough on Prokhorovka. There’s even a joke for it: A bad heavy tank commander will go straight to Prokhorovka after dying.
The map is open, there are almost no safe areas, tanks always remain visible, SPG shells come from everywhere—this is the harsh reality awaiting heavy tanks here.
Heavy Tank Tips Provided by Our Community Contributor “Pillz16”
[MERGE]
Heavy Tank DO’s
Get into position as soon as possible! Move quickly, using the lower ground, to the center of the map along lines “E or F.” From there, you can use your turret armor to the best advantage. If possible, crest the hill and take the crater located at E2, E3, F2, and F3. From here you can turn the tide of the whole battle.
Heavy Tank DON’Ts
Don’t take the high road along line 2! This is a hull-up position from every angle and will get you sent straight back to the garage.
Don’t sit at the back in the tree line.
Don’t cross the middle before all light tanks are out of play.
It’s worth remembering that sometimes there are no light tanks on the teams, which means that the tactics on the map change dramatically! The role of light tanks should be performed by medium tanks with good mobility and view range. Heavy tanks can relax a bit and contribute to the victory by taking the area near the railroad.
Additional Comments from Community Members:
Reddit Ambassador IzBox
I think a key point is to ensure that people understand that Prokhorovka is very “live or die” based on your team’s vision capabilities. Strong light tank players (or high-vision/high-tier mediums) playing the center ridge and knowing when to go into the bowl area in F2/F3 will leave a great impact on the results of the game. You can spot all the way to lines A or K from the bowl when done properly, so the defensive tank destroyers at the back can’t shoot without being spotted.
Here it is, the Prokhorovka map with all its favorable (and not so favorable) positions. Use it to your best advantage and enjoy spectacular victories!
See also our previous guides on the following maps: